| Using graphic tools in Microsoft Word or Microsoft PowerPoint to create graphic organizers for presentations and reports. Keeley Library April 24, 2000 |
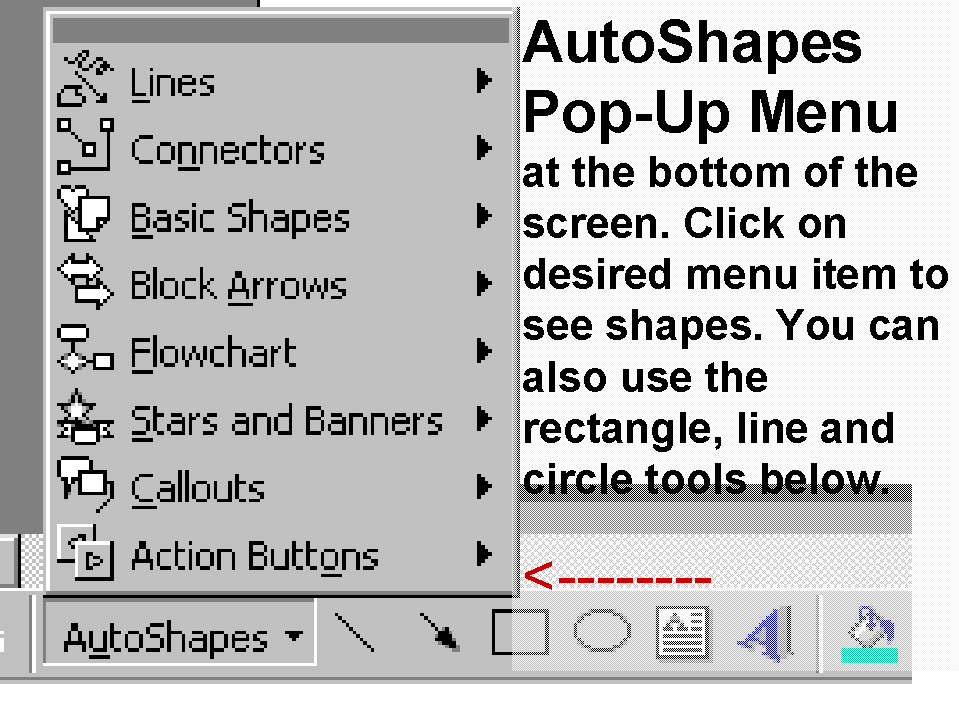 Use
the drawing or graphics toolbar in Microsoft Powerpoint or Word.
Use
the drawing or graphics toolbar in Microsoft Powerpoint or Word.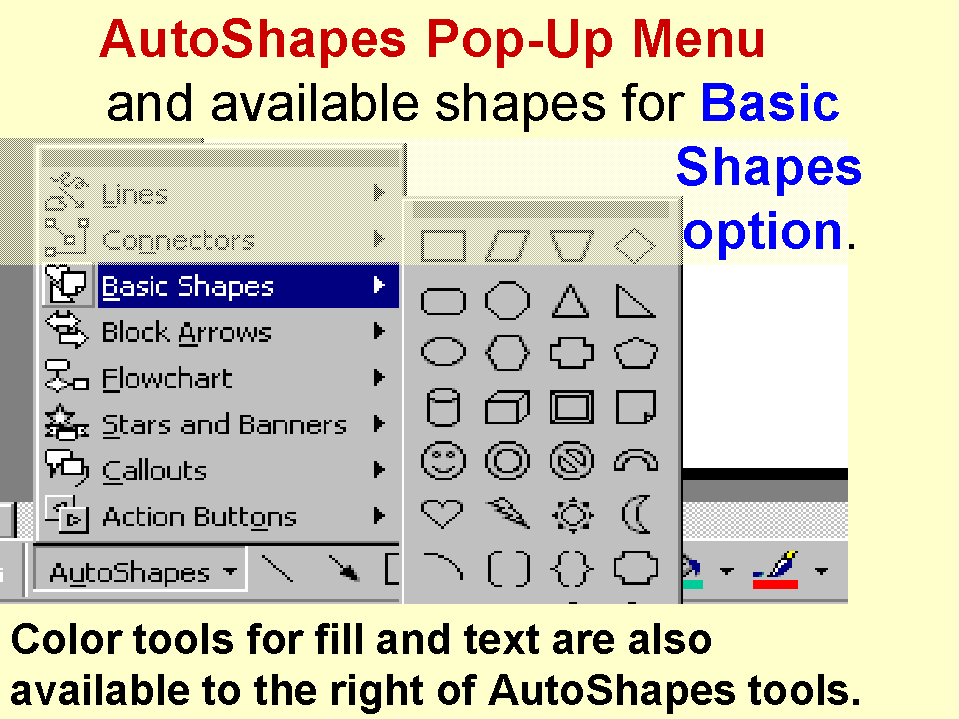
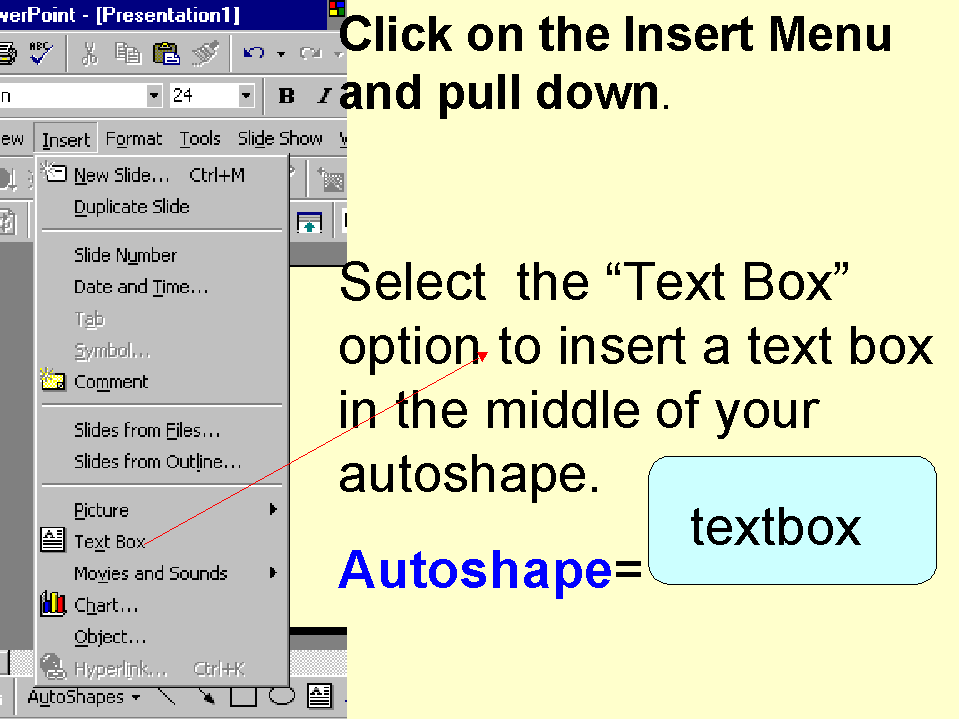 Next,
you will use the Insert Pull Down Menu and choose "Text Box". by
clicking on it. Then, go back and click inside the autoshape to insert
the text box.
Next,
you will use the Insert Pull Down Menu and choose "Text Box". by
clicking on it. Then, go back and click inside the autoshape to insert
the text box.|
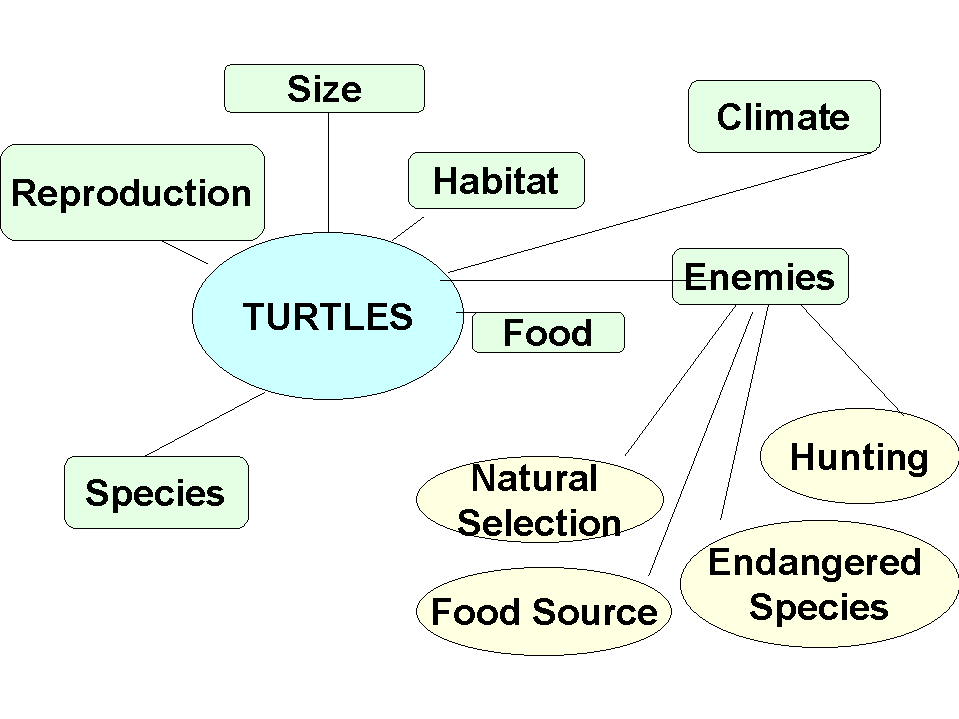
in books and on the web. |